How to ...
Here you can find our instructions and other helpful tips to get the best out of your arena!
Simply place your tile in the middle of four black patches on your floor or table. Make sure the patches on the tile align with the patches on the floor or table. Then press down on the tile until you hear it click into place. Then your tile is placed :)
If you want to place multiple tiles, we recommend starting with a tile in the corner.
Video tutorial:
Products used in this video: Tile Round Corner Assembly, Tile 45 Degrees Assembly, Tile T-Intersection Assembly, Tile Single Gap 100mm Assembly, Semicircular Speed Bump 24 x 1 x 0.5cm
Video tutorial:
Products used in this video: Tile Straight Assembly, Tile Goal Assembly, Mount for Ramp Assembly
Video tutorial coming soon...
Video tutorial:
Place the profiles on the tiles and secure them with the M5 x 16 screws. Arrange the 125 mm walls around the perimeter. Place the silver/black evacuation marker between the evacuation markers and secure it between the profiles.
Video tutorial coming soon ...
Simply peel off the victim that you want to place from the sheet. Since the victim itself is self-adhesive, you can now simply place it on the wall.
Keep in mind the Rescue Maze rules for victims that are described in the rules. Apart from that, however, you can place the victim in any orientation that you want.
Video tutorial coming soon ...
All you need to know for your school ...
Here you will find everything you need to know for your school!
All you need to know for your competition ...
Here you can find everything you need to know for your competition!
The CMS is ideal for competition management, allowing you to plan your arenas, create and manage score sheets and create scoring tables.
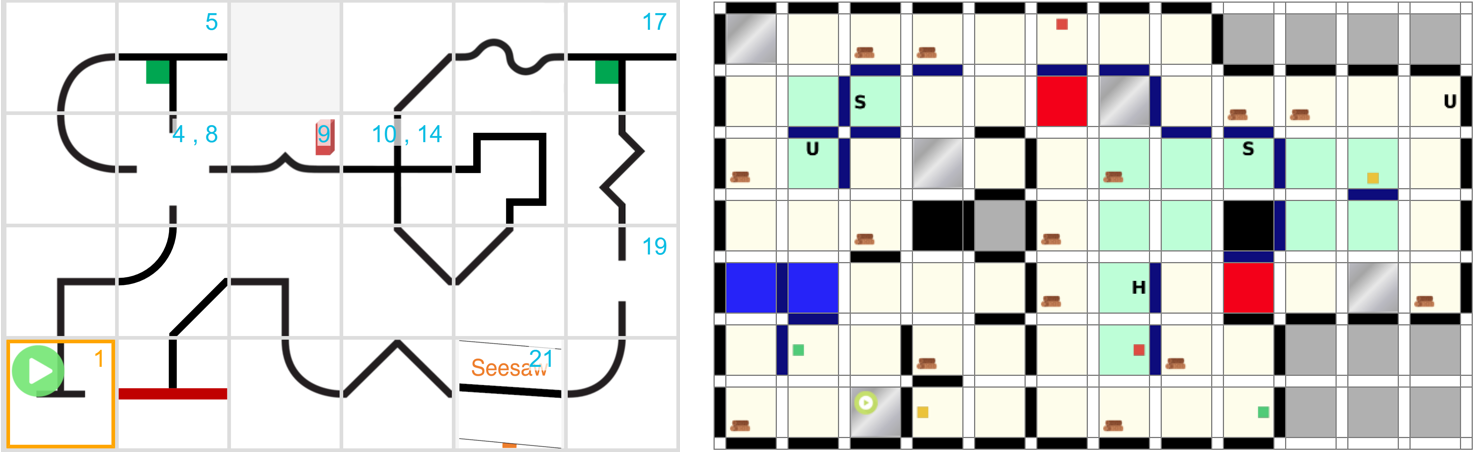
Here you can find examples of arena plans created with the CMS.
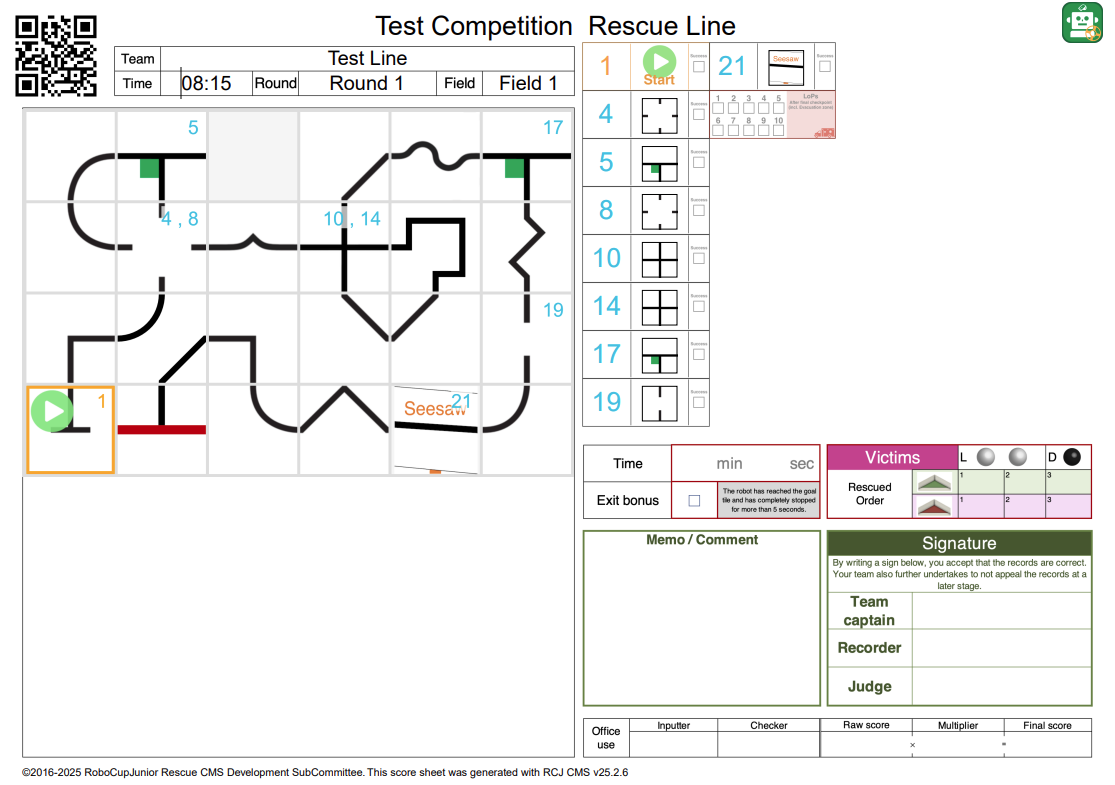
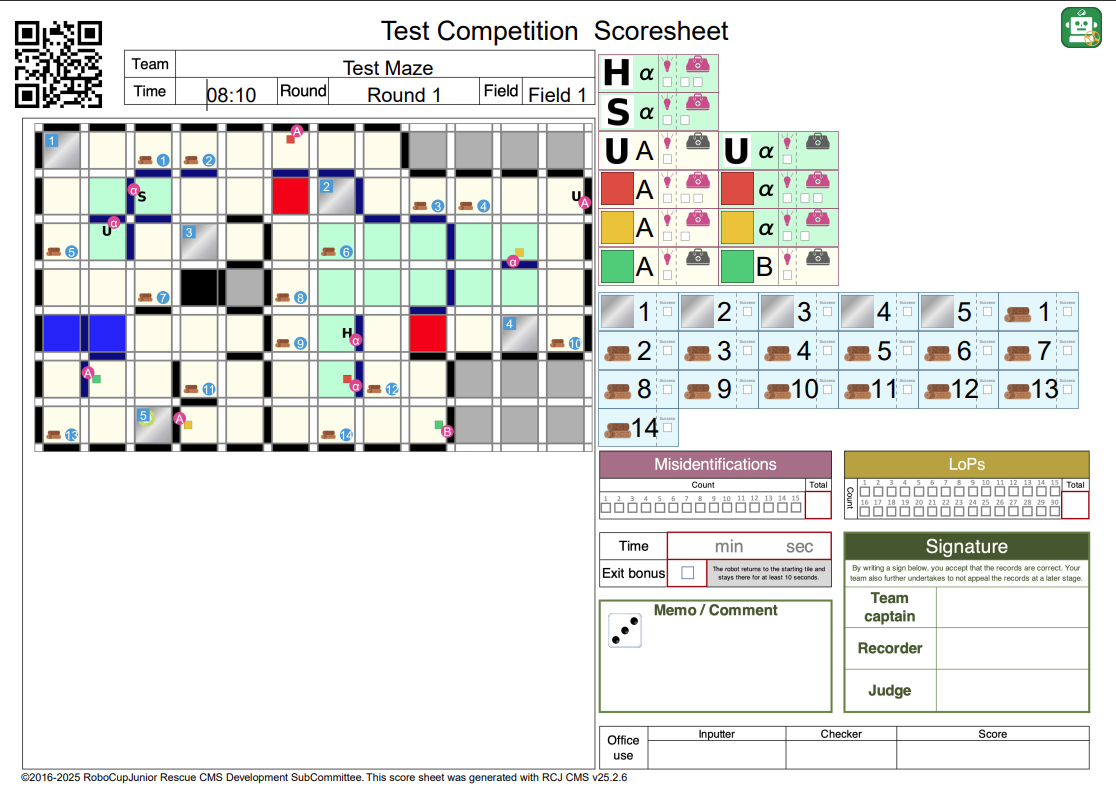
Here are two examples of scoresheets the CMS can create to help you with your competition:

If you are setting up the arenas using our competition kits, we recommend that you purchase the number of kits required plus one extra. This gives you more flexibility when planning your arenas and allows you to be more creative. Depending on the level of your competition and/or your plans, it might make sense to buy more or fewer additional arenas. If you would like our advice on this, please feel free to contact us!